Serving Machine Learning Model With Api
Till now, all the blogs I’ve posted were basically leveraging CNN pre-trained models to develop a model that was useful for our given use case. But from my experience at TCS Rapid Labs, I have learnt that training models is not enough. We not to serve them to make them usable across our production systems.
Now, once we have acknowledged this gap in our learning journey, there is one more thing we need to take account of. Most of the production grade systems and legacy application who are willing to leavrage the power of AI are essentially not written in Python. However, most of us are using Python to train our models. This is where we can use power of APIs.
In this blog, we will be learning to wrap our ML Models into an API. We will be building a simple classifier whose job is to classify a breast tumour as malignant or benign based on the features in the dataset. After that we will be saving the trained model(Serialization & Deserialization), exposing the functionality of the model as an API and testing the API using Postman. Additionally the entire setup is avialble as a Docker Image here and code is availble here.
The model training script is uploaded at the GitHub Repository above and will not be discussed here. However, we will discuss about serializing the model as pickle file, deserializing it and exposing the functionality of the model as a Flask API. We will be using sk-learn’s joblib library for this.
import joblib
joblib.dump(model, 'breast_cancer_knn_model.pkl')
model_columns = list(cancer_data['feature_names'])
joblib.dump(model_columns, 'model_columns.pkl')
Here, the object model refers to our trained model and the model_columns contains the list of columns in the dataset. We will serialize both of these as .pkl file. The reason for serializing model_columns is explained below.
from flask import Flask, request, jsonify
import joblib
import pandas as pd


app = Flask(__name__)

@app.route('/predict', methods=['POST', 'GET'])


def predict():
    if knn_model:
        try:
            if request.get_json() is not None:
                json_ = request.json
                query = pd.get_dummies(pd.DataFrame(json_))
                query = query.reindex(columns=model_columns, fill_value=0)
                prediction = list(knn_model.predict(query))

                return jsonify({'prediction': str(prediction),
                                'Input': request.json})
            else:

                json_ = [request.args]
                query = pd.get_dummies(pd.DataFrame(json_))
                query = query.reindex(columns=model_columns, fill_value=0)
                prediction = list(knn_model.predict(query))

                return jsonify({'prediction': str(prediction),
                                'Input': [request.args]})

        except Exception as e:

            return jsonify({'error': e})
    else:
        print ('Train the model first')
        return ('No model here to use')

if __name__ == '__main__':

    knn_model = joblib.load("breast_cancer_knn_model.pkl")
    print ('Model loaded')
    model_columns = joblib.load("model_columns.pkl")
    print ('Model columns loaded')
    app.run(host='0.0.0.0', port=12345, debug=True)
The above script is responsible for exposing the functionality of out trained model as an API. We have deserialized the two .pkl files.Now, if noticed carefully the function that we wrote would only work under conditions where the incoming request contains all possible values for the categorical variables which may or may not be the case in real-time. If the incoming request does not include all possible values of the categorical variables then as per the current method definition of predict(), get_dummies() would generate a dataframe that has fewer columns than the classifier excepts, which would result in a runtime error. Hence we have serialized the columns of the dataset in .pkl format.
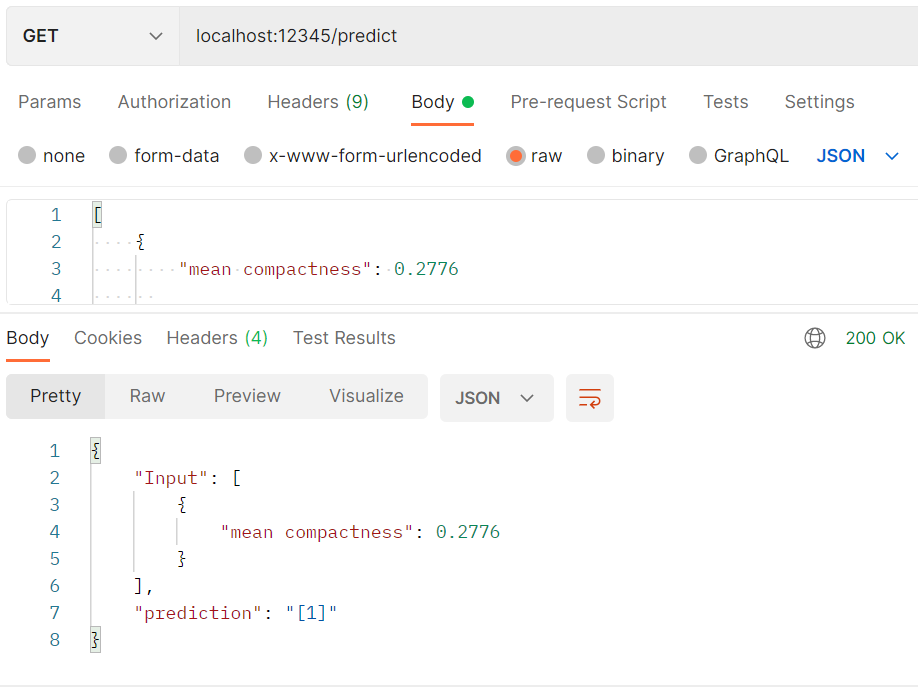
Now that we have written out script, we can test it using Postman or calling the API from a browser to verify whether it’s working correctly or not. Below is a typical input we can send to our API. However, we do not need to send values for all the variables as we have serialized the columns of the dataset as discussed above.
[
    {
        "mean radius": 17.99,
        "mean texture": 10.38,
        "mean perimeter": 122.8,
        "mean area": 1001.0,
        "mean smoothness": 0.1184,
        "mean compactness": 0.2776,
        "mean concavity": 0.3001,
        "mean concave points": 0.1471,
        "mean symmetry": 0.2419,
        "mean fractal dimension": 0.07871,
        "radius error": 1.095,
        "texture error": 0.9053,
        "perimeter error": 8.589,
        "area error": 153.4,
        "smoothness error": 0.006399,
        "compactness error": 0.04904,
        "concavity error": 0.05373,
        "concave points error": 0.01587,
        "symmetry error": 0.03003,
        "fractal dimension error": 0.006193,
        "worst radius": 25.38,
        "worst texture": 17.33,
        "worst perimeter": 184.6,
        "worst area": 2019.0,
        "worst smoothness": 0.1622,
        "worst compactness": 0.6656,
        "worst concavity": 0.7119,
        "worst concave points": 0.2654,
        "worst symmetry": 0.4601,
        "worst fractal dimension": 0.1189
    }
]
After calling the API with Postman, the response received is:
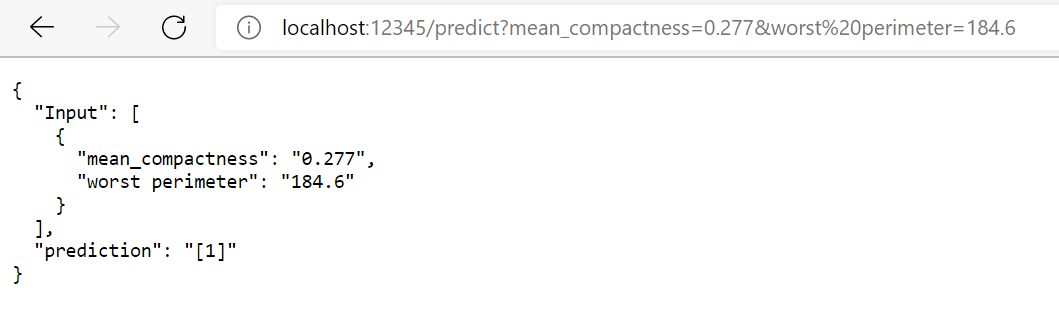
Next, we will test our API by calling it from our browser. As discussed, we need not send values of all the variables for our API to work correctly. The service will interally handle it and give the output response. Hence, we will call the API by
http://localhost:12345/predict?mean_compactness=0.277&worst%20perimeter=184.6
The response should be like:
Thus, we have wrapped a ML Model and exposed it’s functionality as an API. Now, a client application written in any languege will be able to leverage the functionality of the KNN Model.
Now, that we have seen that the API is functioning properly, we will now contanerize our application using Docker. For this, you must have Docker Desktop installed in your respective systems. Once Docker has been installed, create two files named Dockerfile and requirements.txt. Both these files are present on the GitHub Repository for this blog. Now, that we have all the requuired files, we created the docker image and pushed it to Docker Hub after testing it.
This concluded the end of our blog. Next, we can create a dummy clent application that will use our API. We can also deploy our API on Cloud Platforms like Azure, GCP or AWS. Detailed documentations are available in the internet for the same.
To know more about Docker, please go through the Docker Documentation.
The GitHub Repo is available here. The Docker Image is available here.
References: